
| 일 | 월 | 화 | 수 | 목 | 금 | 토 |
|---|---|---|---|---|---|---|
| 1 | 2 | 3 | 4 | 5 | ||
| 6 | 7 | 8 | 9 | 10 | 11 | 12 |
| 13 | 14 | 15 | 16 | 17 | 18 | 19 |
| 20 | 21 | 22 | 23 | 24 | 25 | 26 |
| 27 | 28 | 29 | 30 |
- react
- docker
- 스프링
- 리엑트 네이티브
- 개발자
- 백엔드
- 스타트업
- 프론트엔드
- 리엑트
- github actions
- 서버 개발자
- Java
- 비전공자
- 서버 배포
- 개발
- 풀스택
- 클론코딩
- SQL
- 무중단 배포
- 프론트 엔드
- Spring
- 자바
- spring boot
- react-native
- 국비지원
- 코딩
- JPA
- react native
- Redux
- 스프링 부트
- Today
- Total
오티스의개발일기
[REACT NATIVE] 인스타그램 클론 코딩 (13) 마이페이지 ui 만들기 본문

< 이전글
2023.01.01 - [개발/react-native] - [REACT NATIVE] 인스타그램 클론 코딩 (12) AsyncStorage 를 사용하여 jwt 토큰 저장하기
[REACT NATIVE] 인스타그램 클론 코딩 (12) AsyncStorage 를 사용하여 jwt 토큰 저장하기
< 이전글 2022.12.31 - [개발/spring boot] - [SPRING BOOT] 리엑트 네이티브 인스타그램 클론 코딩 (11) JWT 를 사용한 회원정보 상태관리 구현 -git참조- [SPRING BOOT] 리엑트 네이티브 인스타그램 클론 코딩 (11) J
otis.tistory.com
다음글 >
2023.01.01 - [개발/react-native] - [REACT NATIVE] 인스타그램 클론 코딩 (14) gorhom/bottom-sheet 를 활용한 바텀 시트 만들기
[REACT NATIVE] 인스타그램 클론 코딩 (14) gorhom/bottom-sheet 를 활용한 바텀 시트 만들기
< 이전글 2023.01.01 - [개발/react-native] - [REACT NATIVE] 인스타그램 클론 코딩 (13) 마이페이지 ui 만들기 [REACT NATIVE] 인스타그램 클론 코딩 (13) 마이페이지 ui 만들기 < 이전글 2023.01.01 - [개발/react-native] -
otis.tistory.com
저번 포스팅에서 언급했던 jwt를 통해 사용자 정보를 불러오고 로그아웃할수있는 기능을 구현해야하지만
그전에 일단 ui 제작을 먼저 진행할것이기때문에 오늘은 ui를 먼저 제작해 보겠다.
# 오늘 작업할 파일목록
- MyPageScreen.js
- Header.js
- Profile.js
- StoryList
- Story.js
# 0. 폴더 구조
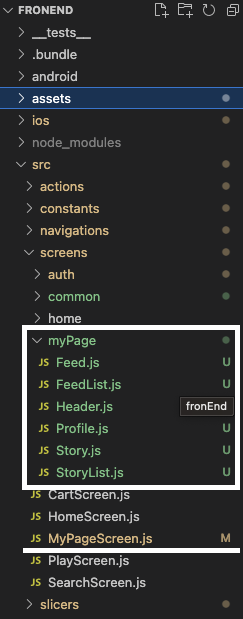
흐름은 저번시간에 만든 HomeScreen 과 비슷한 형식이다.
그리고 StoryList.js 와 Story.js 같은 경우 HomeScreen.js 에서 썼던 파일을 그냥 가져와 썼다.
아래에 첨부했으니 참고하자
[REACT NATIVE] 리엑트 네이티브 인스타그램 클론 코딩 (1) 계획 및 프로젝트 네비게이션 생성 및 홈
다음글 > 2022.12.25 - [에러 모음/react-native] - [REACT NATIVE] 리엑트 네이티브 인스타그램 클론 코딩 (2) Formik + yub 을 사용하여 인스타 그램 로그인폼 구현하기 -git 참조- [REACT NATIVE] 리엑트 네이티브 인
otis.tistory.com
일단 MyPageScreen.js 를 수정해보자
# 1. MyPageScreen.js 수정
import React from 'react'
import styled, { ThemeProvider } from "styled-components/native";
import { useDispatch, useSelector } from "react-redux"; // userDispatch = 데이터 변경시 사용 // useSelector = 데이터 가져올때 사용
import { darkTheme, lightTheme } from "../../Theme";
import themeSlicer from "../slicers/themeSlicer";
import Header from './myPage/Header'
import Profile from './myPage/Profile'
import StoryList from './myPage/StoryList'
const MyPageScreen = ({ }) => {
const theme = useSelector((state) => state.themeSlicer.theme);
const dispatch = useDispatch();
return (
<SafeAreaView>
<Header/>
<Profile/>
<StoryList/>
</SafeAreaView>
)
}
export default MyPageScreen
const Text = styled.Text`
color: ${props => props.theme.TextColor};
`;
const Container = styled.View`
flex: 1;
justify-content: center;
align-items: center;
`;
const SafeAreaView = styled.SafeAreaView`
flex: 1;
background-color: ${props => props.theme.backgroundColor};
`;
이역시 HomeScreen.js 구조와 거의 동일하다 위에 올린 전 포스팅을 참고하자
상단의 Header.js 를 생성해보자
#2. Header.js 생성
import React from 'react'
import styled, { ThemeProvider } from "styled-components/native";
import { useDispatch, useSelector } from "react-redux"; // userDispatch = 데이터 변경시 사용 // useSelector = 데이터 가져올때 사용
import { darkTheme, lightTheme } from "../../../Theme";
import themeSlicer from "../../slicers/themeSlicer";
import Ionicons from "react-native-vector-icons/Ionicons";
import HeaderLogo from '../../../assets/header-logo.png'
import {ICONS} from '../../constants/icons'
const Header = ({ }) => {
const theme = useSelector((state) => state.themeSlicer.theme);
const dispatch = useDispatch();
return (
<Container>
<HeaderBox>
<TouchableOpacity>
<UserName>oooo_nn</UserName>
</TouchableOpacity>
<HeaderIconBox>
<TouchableOpacity>
<Ionicons name={ICONS.addCircleOutline} size={28} color="white" />
</TouchableOpacity>
<TouchableOpacity>
<Ionicons name={ICONS.menuOutline} size={28} color="white" />
</TouchableOpacity>
</HeaderIconBox>
</HeaderBox>
</Container>
)
}
export default Header
const Text = styled.Text`
color: ${props => props.theme.TextColor};
`;
const UserName = styled.Text`
color: ${props => props.theme.TextColor};
font-size: 26px;
font-weight: bold;
`;
const TouchableOpacity = styled.TouchableOpacity`
margin-left: 15px;
`;
const Container = styled.View`
margin-right: 10px;
`;
const UnderRedIconText = styled.Text`
color: white;
font-weight: 600;
`;
const HeaderBox = styled.View`
flex-direction: row;
align-items: center;
justify-content: space-between;
`;
const HeaderIconBox = styled.View`
flex-direction: row;
align-items: center;
justify-content: space-between;
`;
const View = styled.View`
`;
이런 모습이다.
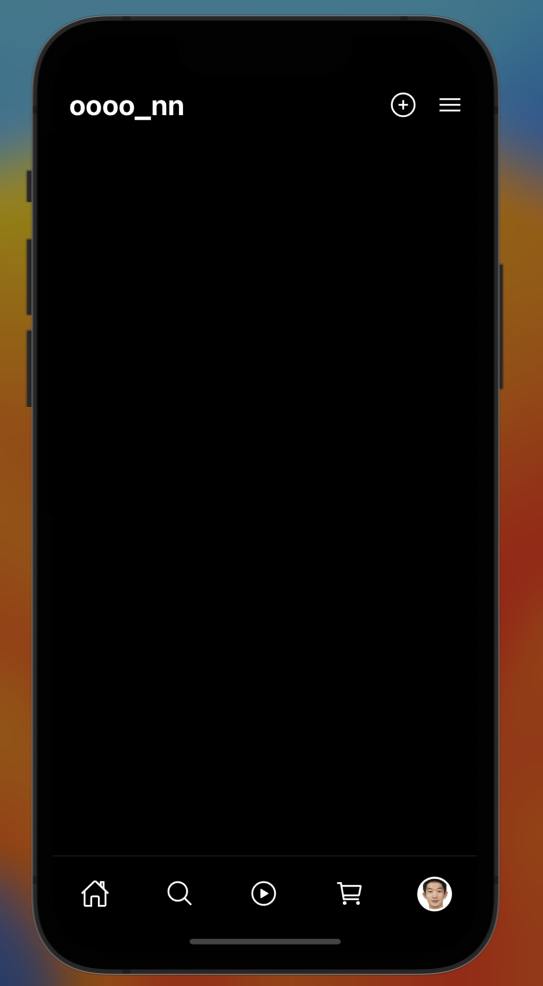
문제없이 만들어졌으니 이제 Profile.js 를 만들어보겠다.
# 3. Profile.js
import { StyleSheet, Text, View } from 'react-native'
import React from 'react'
import styled from "styled-components/native";
const header = () => {
return (
<ProfileContainer>
<ProfileBox>
<TouchableOpacity>
<Avatar source={{uri: 'https://i.ibb.co/ZhB1QPv/image.jpg'}}/>
</TouchableOpacity>
<ProfileInfoContainer>
<ProfileInfoBox>
<ViewContent>11</ViewContent>
<Content>게시물</Content>
</ProfileInfoBox>
<ProfileInfoBox>
<ViewContent>11</ViewContent>
<Content>게시물</Content>
</ProfileInfoBox>
<ProfileInfoBox>
<ViewContent>11</ViewContent>
<Content>게시물</Content>
</ProfileInfoBox>
</ProfileInfoContainer>
</ProfileBox>
<UserName>온석태</UserName>
<ProfileEditingContainer>
<TouchableOpacity>
<ProfileEditingButton>
<ProfileEditingButtonText>
프로필 편집
</ProfileEditingButtonText>
</ProfileEditingButton>
</TouchableOpacity>
</ProfileEditingContainer>
</ProfileContainer>
)
}
export default header
const ProfileContainer = styled.View`
padding: 10px;
`
const ProfileBox = styled.View`
padding: 10px;
margin-bottom: 10px;
flex-direction: row;
justify-content: space-between;
align-items: center;
`
const TouchableOpacity = styled.TouchableOpacity`
`;
const ProfileInfoContainer = styled.View`
flex-direction: row;
justify-content: space-between;
`
const ProfileInfoBox = styled.View`
align-content: center;
align-items: center;
margin-left: 50px;
`
const ViewContent = styled.Text`
color: ${props => props.theme.TextColor};
margin-bottom: 5px;
font-weight: bold;
font-size: 18px;
`
const Content = styled.Text`
color: ${props => props.theme.TextColor};
`
const Avatar = styled.Image`
width: 100px;
height: 100px;
border-radius: 50px;
border-width: 2px;
border-color: white;
`;
const UserName = styled.Text`
color: ${props => props.theme.TextColor};
font-size: 18px;
font-weight: 600;
`
const ProfileEditingContainer = styled.View`
margin-top: 15px;
`
const ProfileEditingButton = styled.View`
background-color: ${props => props.theme.LigtherColor};
border-radius: 5px;
padding: 8px 10px;
align-items: center;
`
const ProfileEditingButtonText = styled.Text`
color: ${props => props.theme.TextColor};
font-weight: bold;
`
최종적으로 만들어진 모습이다.
정상적으로 동작한다... ㅎㅎㅎ
피드를 만들지 않은이유는
두가지이다..
일단 첫번째는 시간적 여유가 있을때 ScrollView 를 FlatView로 교체할예정이다.
하지만 공부도해야하고 생각보다 깊은 정보가 필요하기에 일단 모든 기능은 간단하고 심플하게 만들고
하나하나 빌드업해나가려고한다...
계획은 이러하고
다음 포스팅은 오른쪽 상단에있는 햄버거버튼을 눌렀을시 바텀시트가 나오도록 만드려고한다.
그것에대해 포스팅해보겠다.
밑에 깃주소가있으니 참고바란다.
# 깃허브 주소
https://github.com/1domybest/react-native-ig-clone.git
GitHub - 1domybest/react-native-ig-clone
Contribute to 1domybest/react-native-ig-clone development by creating an account on GitHub.
github.com
다음글 >
2023.01.01 - [개발/react-native] - [REACT NATIVE] 인스타그램 클론 코딩 (14) gorhom/bottom-sheet 를 활용한 바텀 시트 만들기
[REACT NATIVE] 인스타그램 클론 코딩 (14) gorhom/bottom-sheet 를 활용한 바텀 시트 만들기
< 이전글 2023.01.01 - [개발/react-native] - [REACT NATIVE] 인스타그램 클론 코딩 (13) 마이페이지 ui 만들기 [REACT NATIVE] 인스타그램 클론 코딩 (13) 마이페이지 ui 만들기 < 이전글 2023.01.01 - [개발/react-native] -
otis.tistory.com


